Creating Google Calendar API Key
This guide explains how to create a Google Calendar API Key using the current Google Cloud Console interface and connect it to Modern Events Calendar (MEC).
No prior experience with Google APIs is required.
Step 1: Sign in to Google Cloud Console
- Open the Google Cloud Console:
https://console.cloud.google.com/
- Sign in using your Google account.
If this is your first time using Google Cloud, Google may ask you to accept terms of service or select a country. Complete those steps before continuing.
Step 2: Create or Select a Project
All Google APIs must belong to a project.
- At the top of the console, click Select a project.
- If you already have a project, select it.
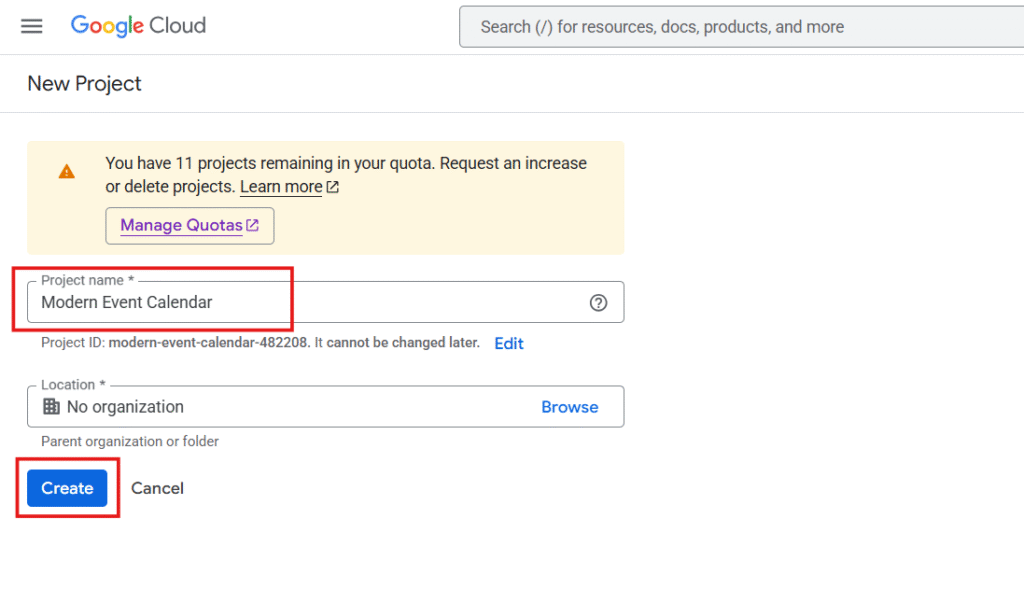
- If not, click New Project.
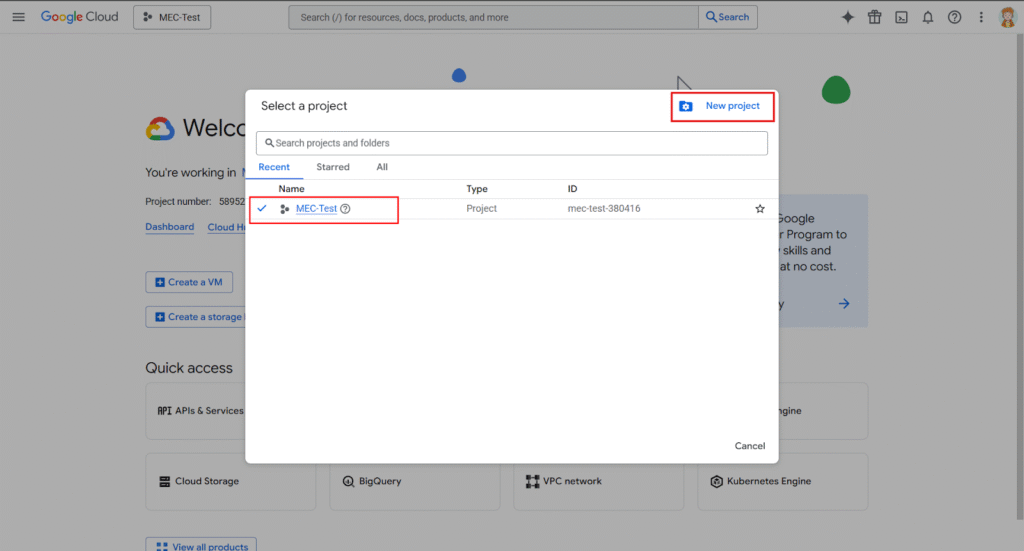
- Enter a Project name (any name is fine).
- Click Create.
- Make sure the newly created project is selected.
Every API key, permission, and setting you create will belong to this project.
Step 3: Enable Google Calendar API
The API must be explicitly enabled before it can be used.
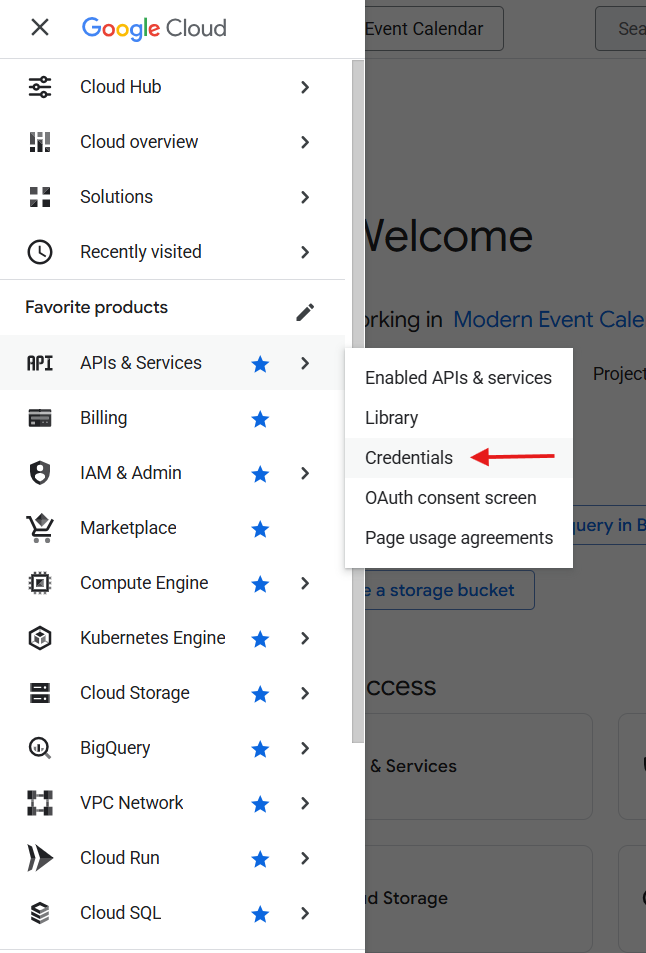
- Open the main menu (☰).
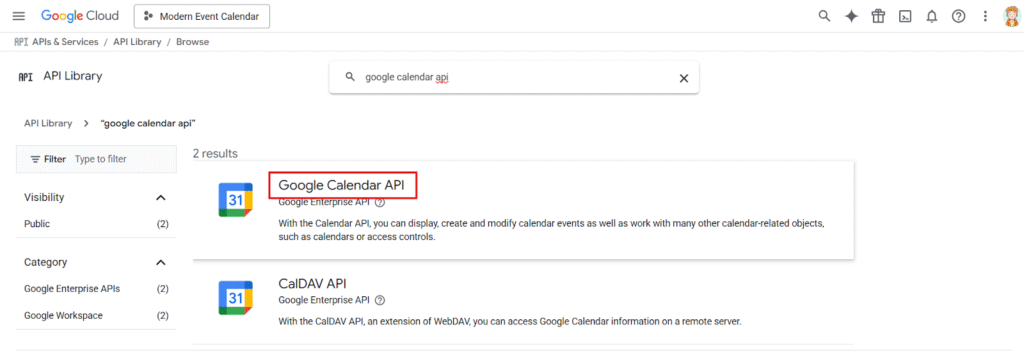
- Go to APIs & Services → Library.
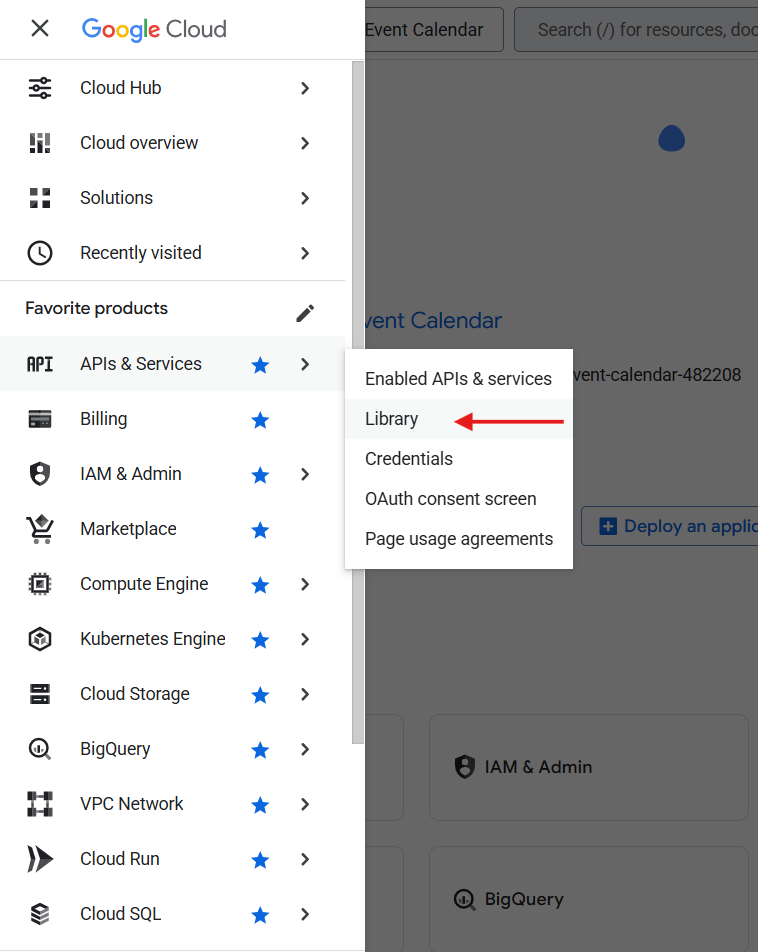
- In the search box, type Google Calendar API.
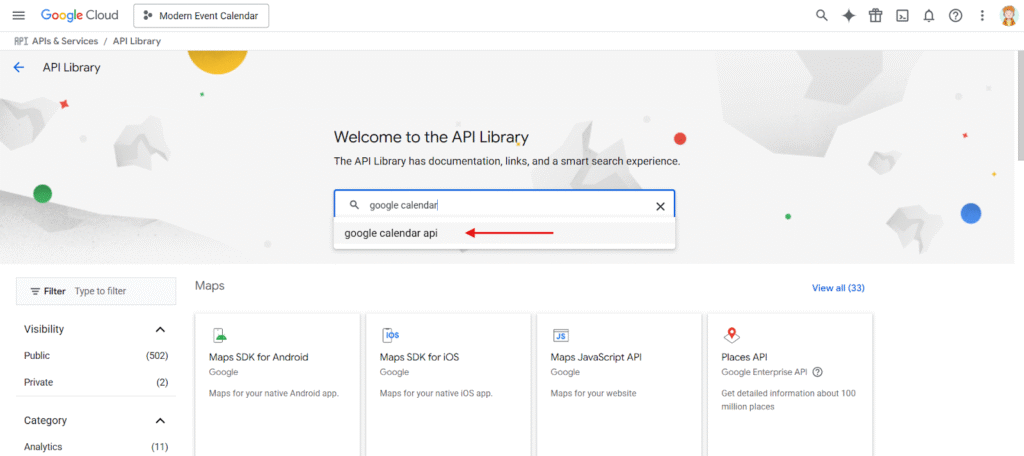
- Click on Google Calendar API.
- Click Enable.
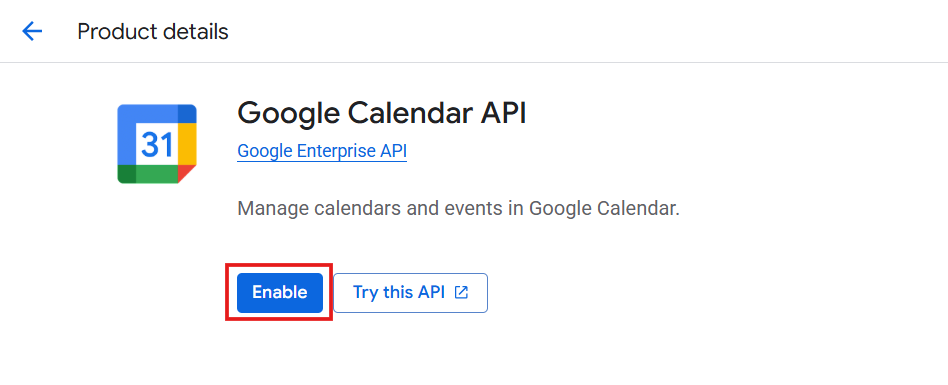
Without this step, the API key will not work even if it is created successfully.
Step 4: Create and Configure API Key
In this step, you will create the API key that MEC uses to communicate with Google Calendar.
Google now combines creating the API key and applying restrictions into a single step:
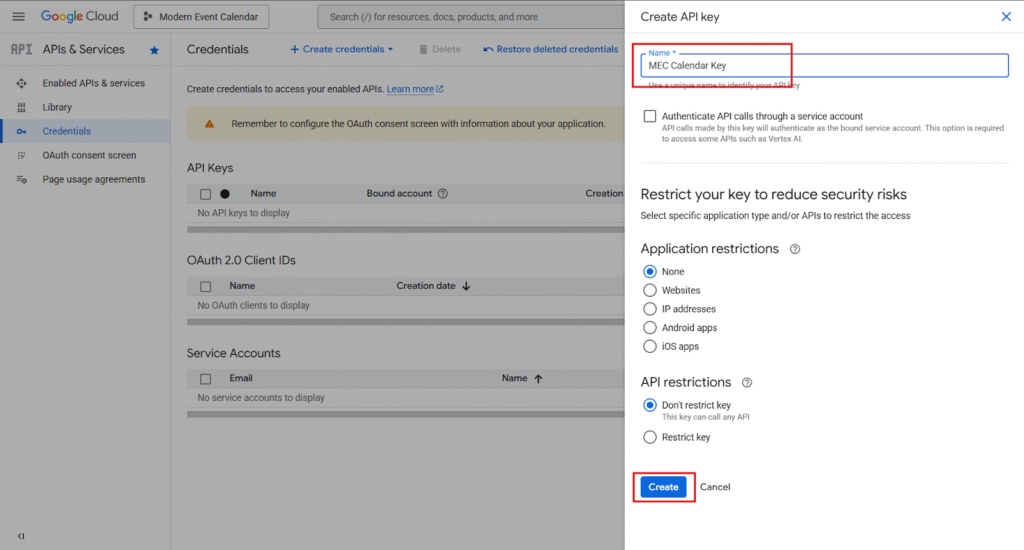
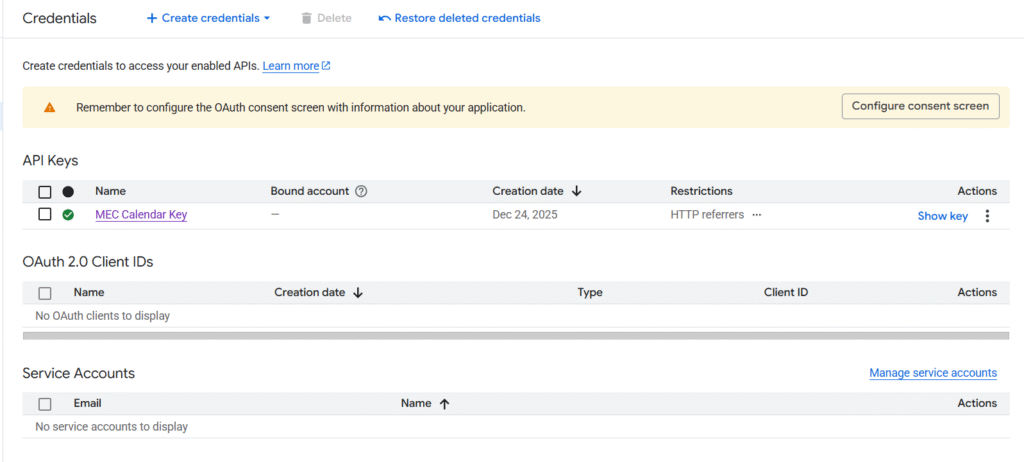
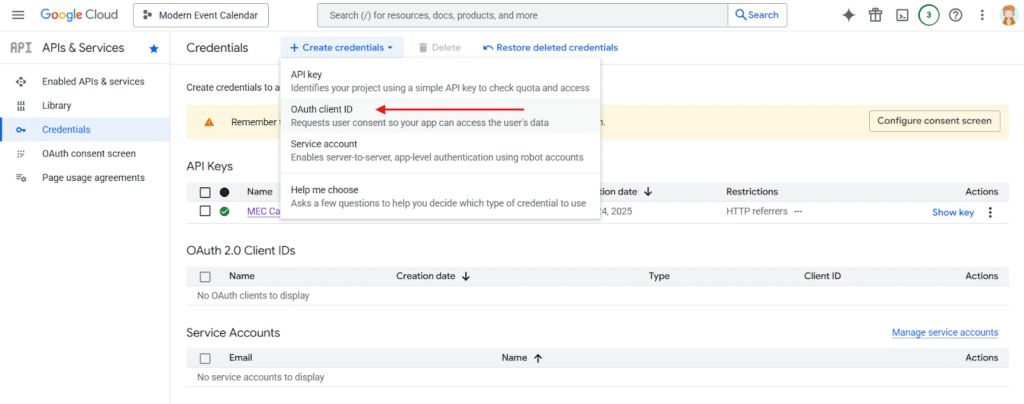
- Go to APIs & Services → Credentials.
- Click Create credentials → API key.
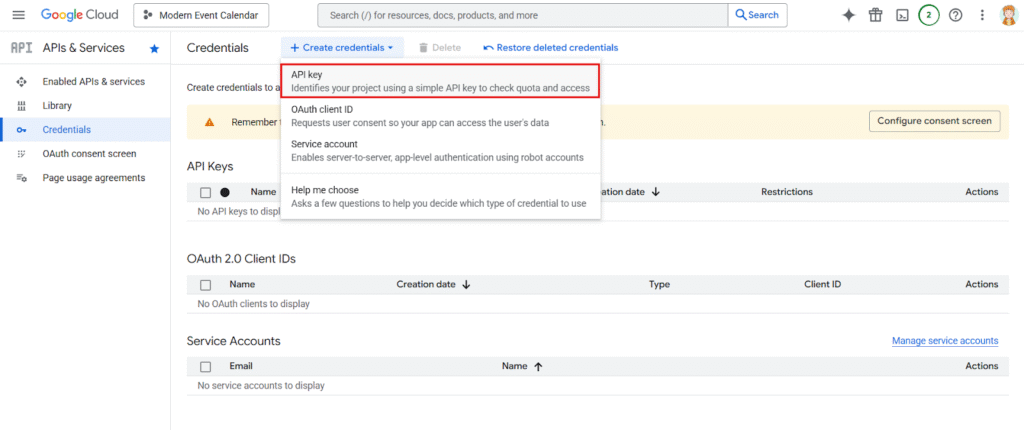
- A popup appears:
- Name your API key (any descriptive name, e.g., “MEC Calendar Key”)
- Optionally, under Restrict your key to reduce security risks:
- Set API restrictions → select Google Calendar API
- Set Application restrictions → for example, HTTP referrers (add your website domain)
- Click Create.
- Your new API key will now be displayed. Copy and save it safely.
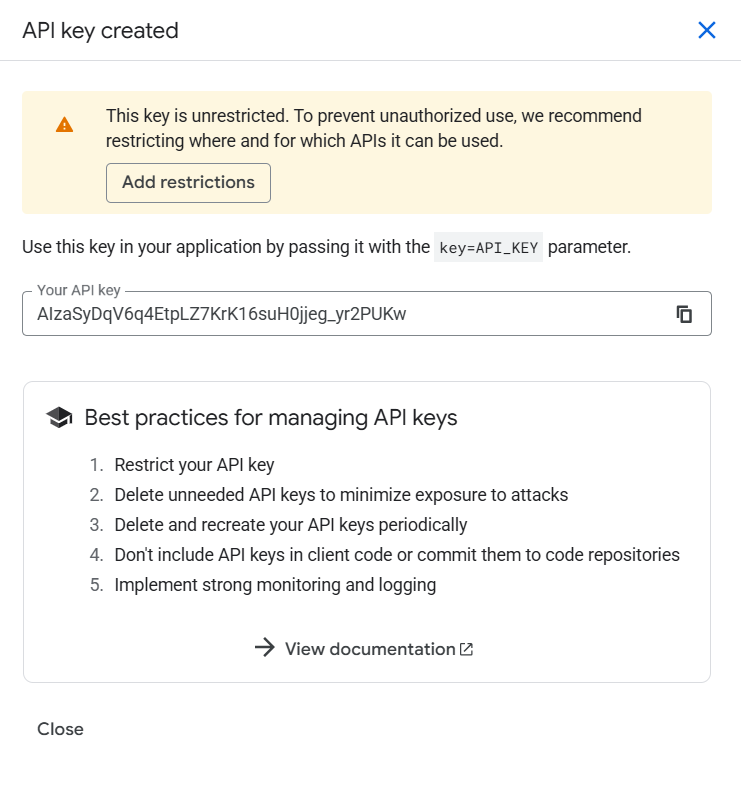
This flow merges key creation and restriction setup. You no longer need separate steps for restricting the key.
Step 5: OAuth Setup – For Private Calendars Only
⚠️ Skip this step if you only need access to public calendars.
Most users who only want to import public calendars do not need to complete this step.
If you need to access private calendars, Google requires user authorization via OAuth.
Configure OAuth Consent Screen
- Go to APIs & Services → OAuth consent screen.
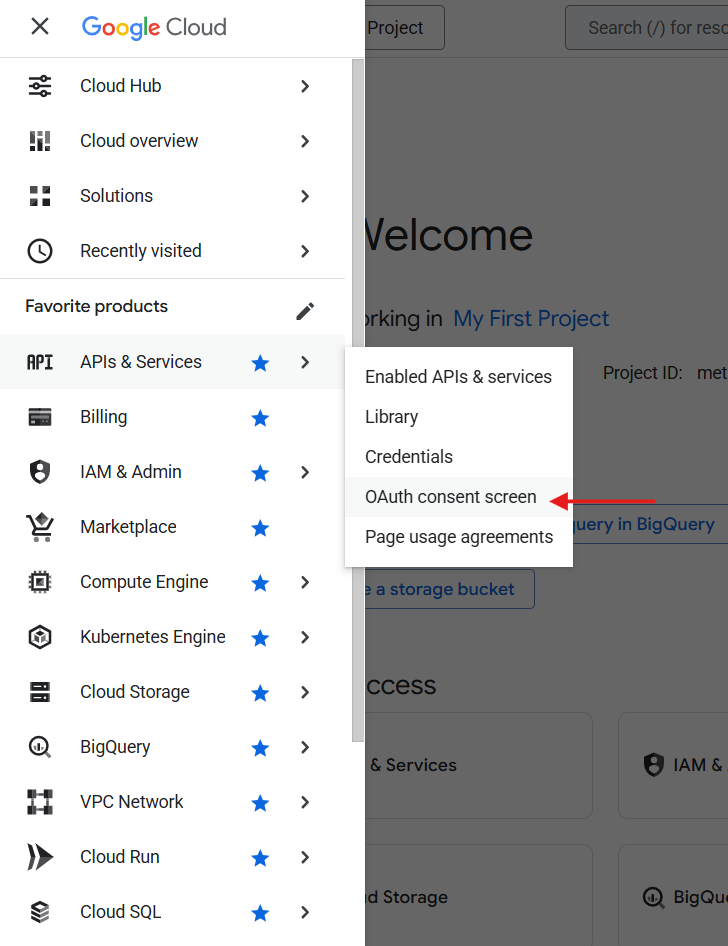
- Click the Get started button.
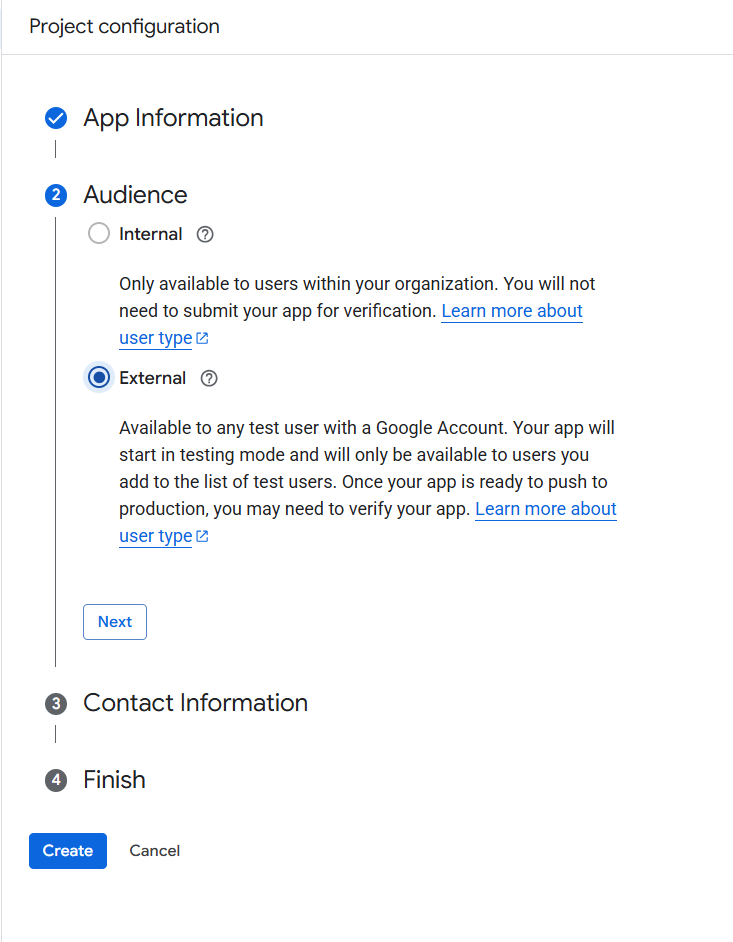
- Complete the App Information section:
- App name
- User support email

- Click Next, then in the Audience section, select External.
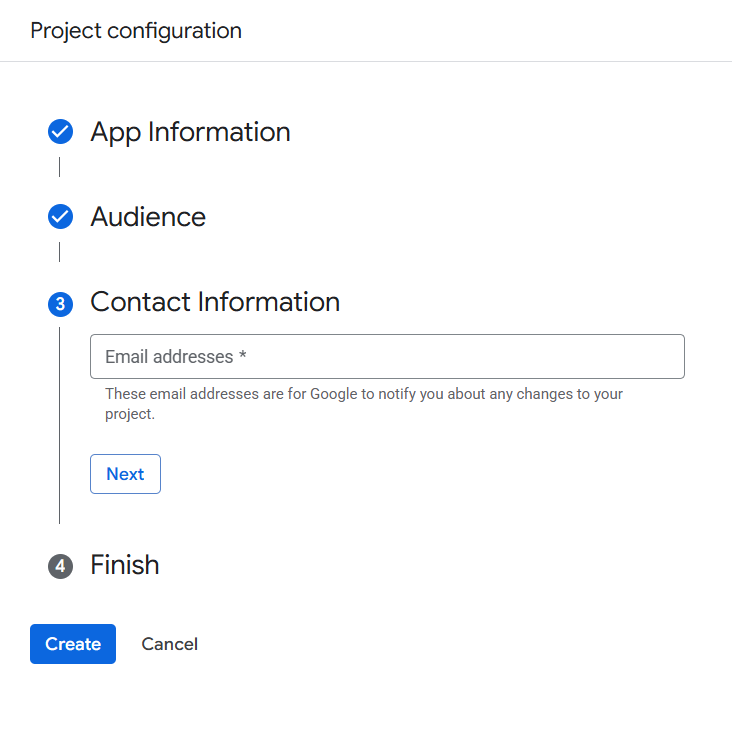
- Click Next, then in Contact Information, enter your email address(es).
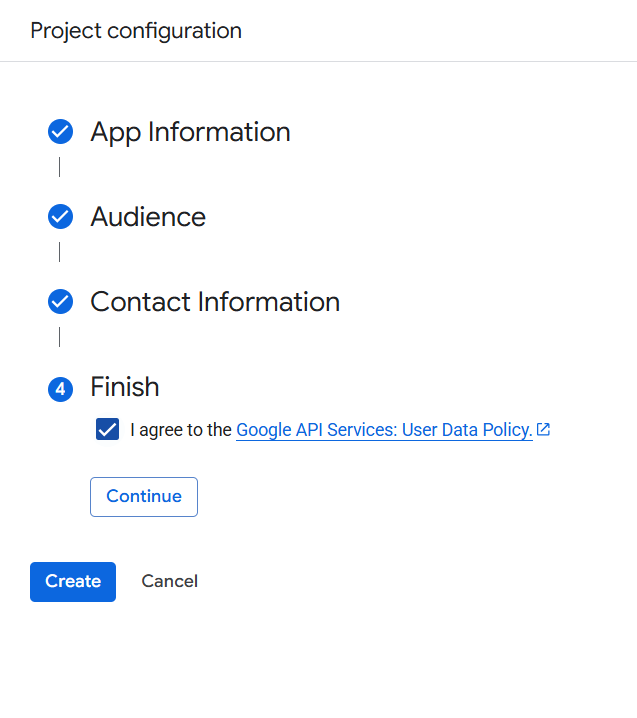
- Click Next, then check the box:
- I agree to the Google API Services: User Data Policy
- Click Continue, then click Create.
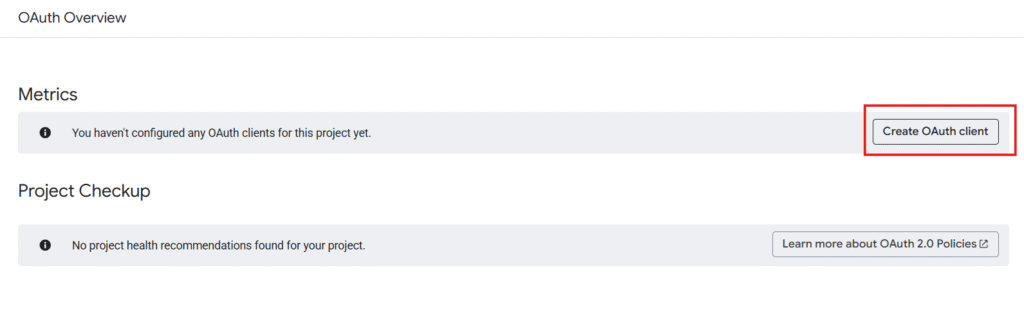
Create OAuth Client ID
After completing the OAuth Consent Screen setup:
- On the next page after finishing the OAuth consent setup, you can click the Create OAuth client button.
- Alternatively, you can go to APIs & Services → Credentials and click Create credentials → OAuth client ID.
Then:
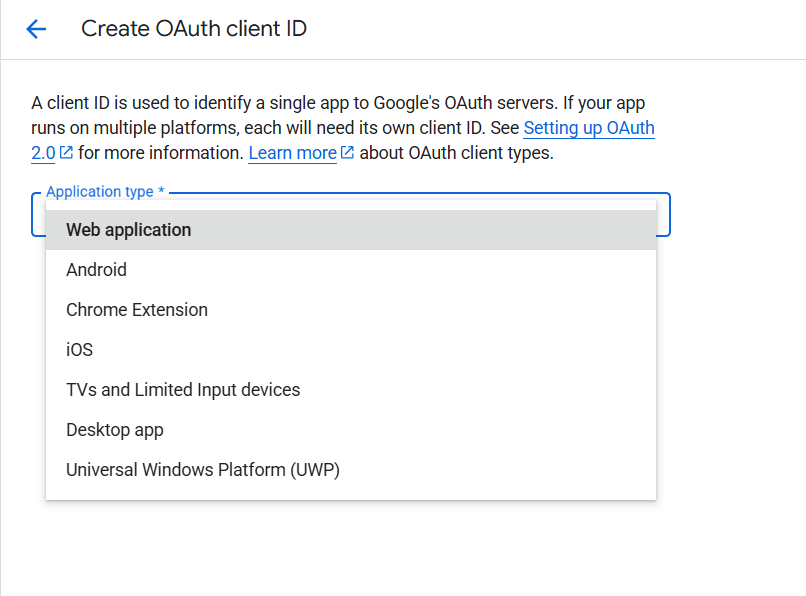
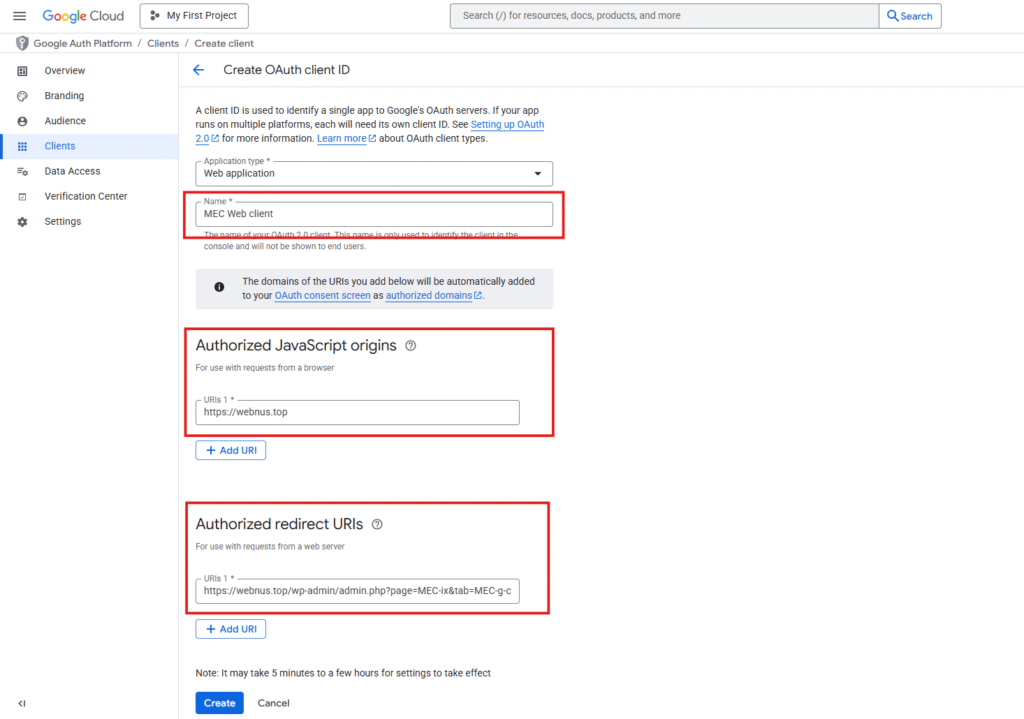
- Select Web application.
- Enter a name for your client (any descriptive name).
- Add Authorized redirect URIs if required by your integration.
- Click Create.
Both methods (via the Create OAuth client button or the Credentials menu) achieve the same result. Use whichever is more convenient.
OAuth credentials are separate from the API key and are only needed when accessing private calendar data.
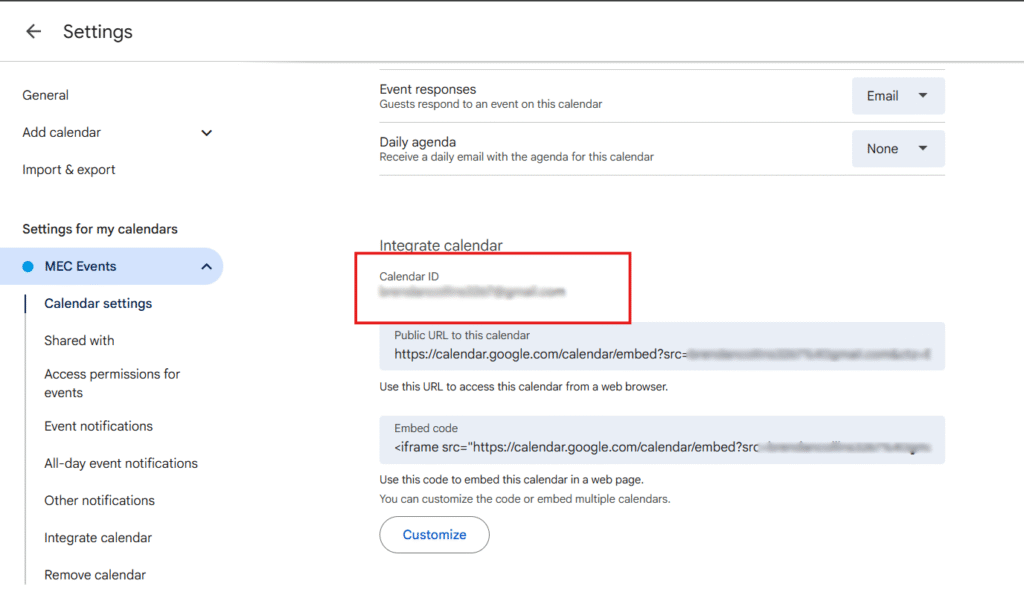
Step 6: Get Your Google Calendar ID
- Open Google Calendar.
- Click Settings.
- Under Settings for my calendars, select the calendar you want to use.
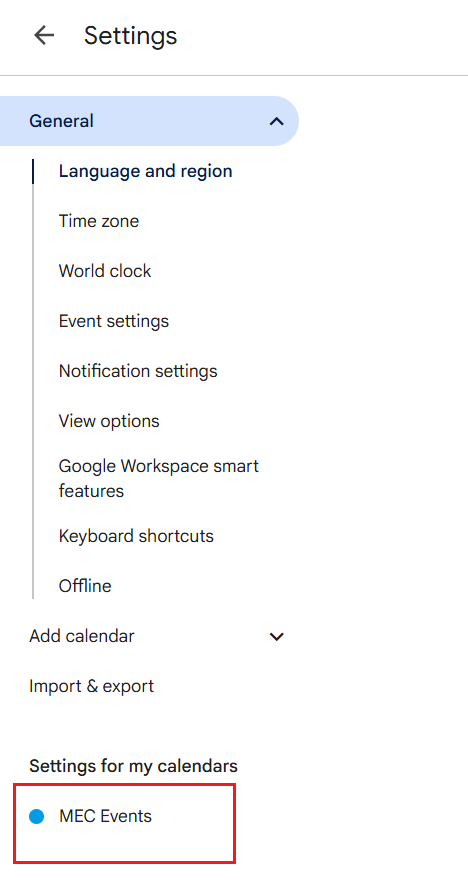
- Find and copy the Calendar ID.
Step 7: Configure Google Calendar in Modern Events Calendar
The Google Calendar integration in MEC uses different credentials depending on the action you want to perform.
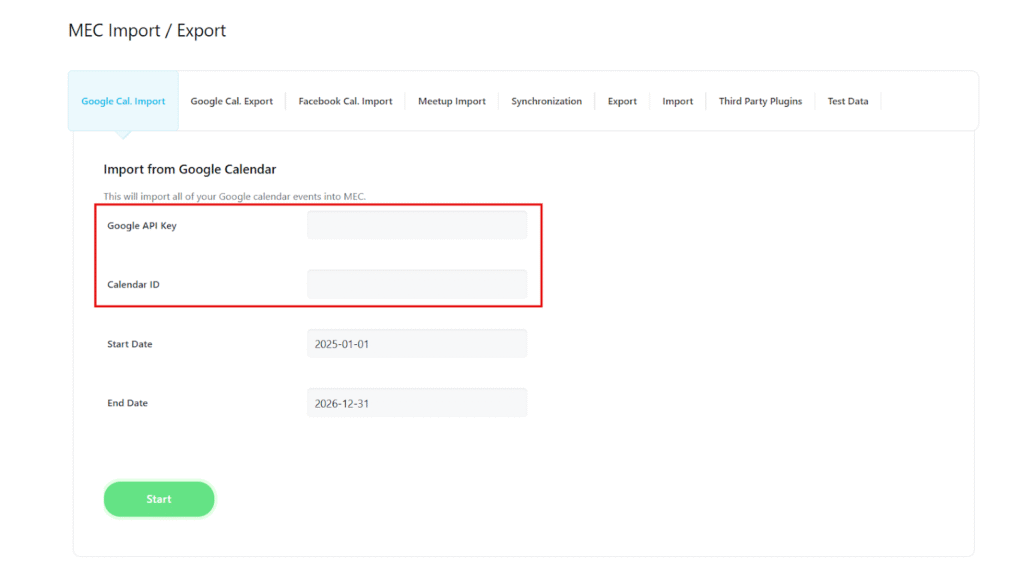
Import Events from Google Calendar (Into MEC)
For importing events from Google Calendar into MEC, only the following are required:
- API Key
- Calendar ID
To configure this:
- Go to your WordPress dashboard.
- Navigate to MEC → Import / Export → Google Cal. Import tab.
- Enter your API Key.
- Enter the Calendar ID.
This method is used by MEC’s built-in Import / Export feature to fetch events from Google Calendar and does not require OAuth authentication.
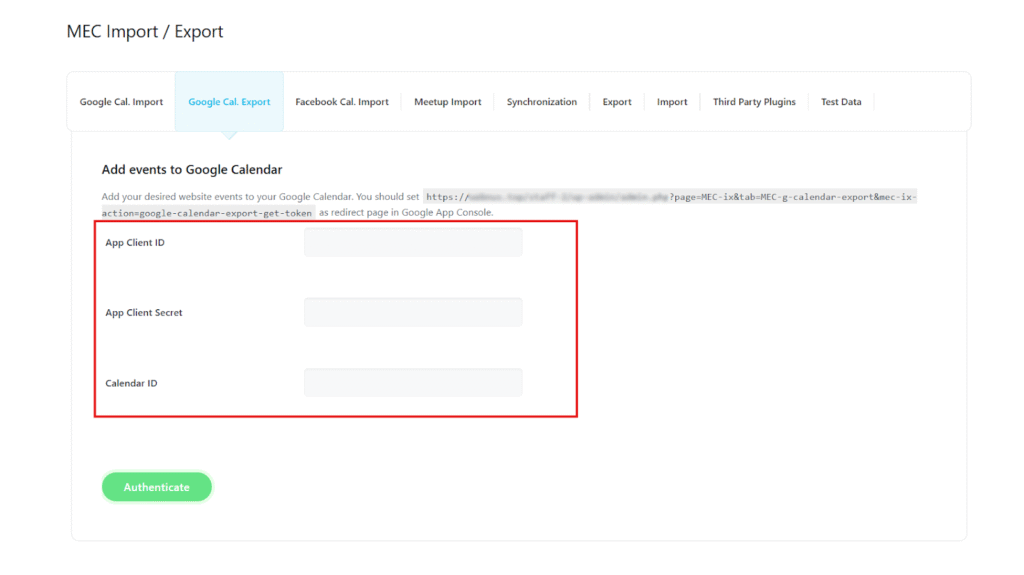
Export Events to Google Calendar (From MEC)
For exporting events from MEC to Google Calendar, Google requires authenticated access.
This means you must use OAuth credentials, not just an API key.
For exporting, you need:
- Client ID
- Client Secret
- Calendar ID
To configure this:
- Navigate to MEC → Import / Export → Google Cal. Export tab.
- Enter the Client ID, Client Secret, and Calendar ID.
- Click Authenticate.
After authentication, you may be redirected to a Google login and permission screen.
This is expected behavior and means Google requires you to:
- Select your Google account
- Approve the requested access permissions
Once approved, MEC will be authorized to export events to your Google Calendar.
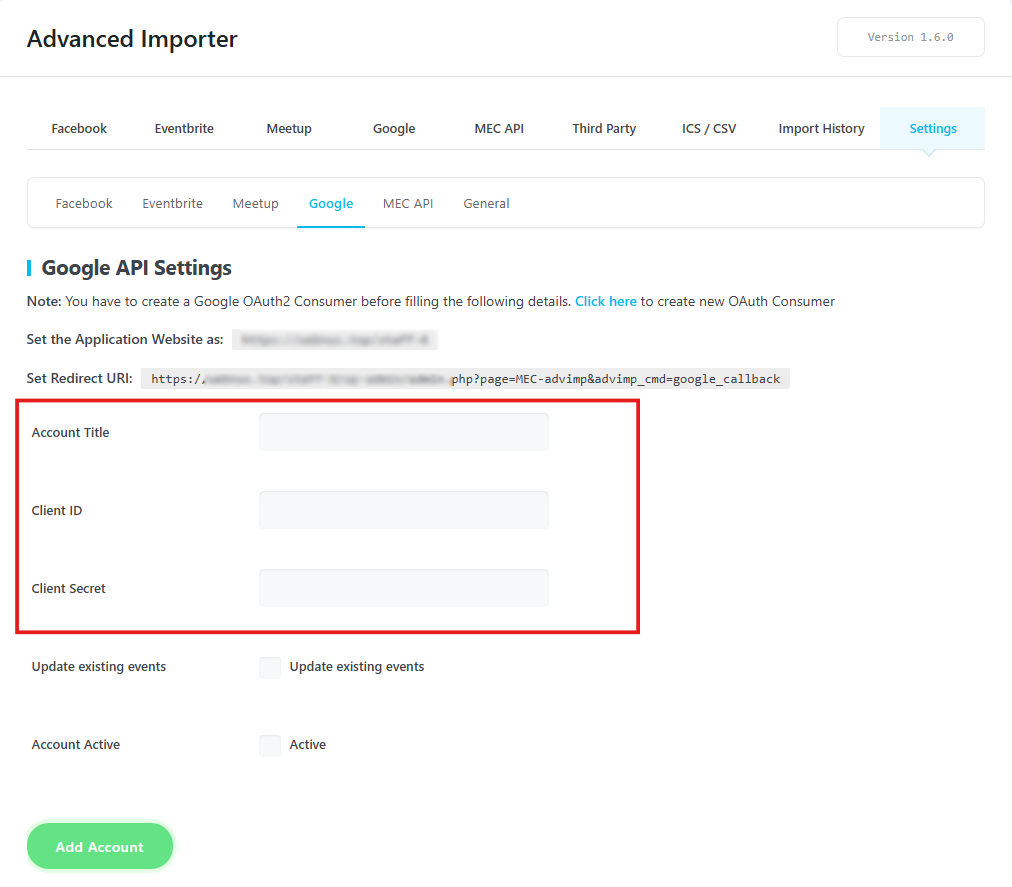
Using the Advanced Importer Addon
If you are using the Advanced Importer addon, note that it uses OAuth authentication as well.
In this case:
- Client ID and Client Secret must be configured inside the Advanced Importer settings
- The Advanced Importer creates and manages its own Google authentication
- Its OAuth setup is separate from MEC’s Import / Export Google settings
The Advanced Importer only handles imports and does not reuse the OAuth configuration from MEC’s Google Calendar Export.
Important Notes
• API Key + Calendar ID are used for importing events via MEC core.
• Client ID + Client Secret + Calendar ID are used for exporting events from MEC.
• Advanced Importer uses its own OAuth configuration and authentication flow and does not use the API Key.
• The API Key is only required for the Google Calendar Import/Export feature in MEC.
• Being redirected to Google for authentication does not mean the API Key has expired.
• It simply means Google requires permission approval for OAuth-based actions.
Updated on: 01/02/2026
Thank you!