Webex Integration Addon
The Webex Integration Addon is a professional bridge that connects Modern Events Calendar (MEC) with your Webex account 1. This integration allows you to display critical online event details—such as join links, passwords, and embedded codes—directly on your event pages 2. You can automate the delivery of these credentials via email and control exactly when and to whom this information is visible.
Initial Setup
To begin integrating your online meetings and webinars, ensure your environment meets the following requirements:
Requirements
- MEC Pro or Lite: This addon is compatible with both the Pro and Lite versions of Modern Events Calendar. Note that certain advanced booking features may vary depending on your base MEC version.
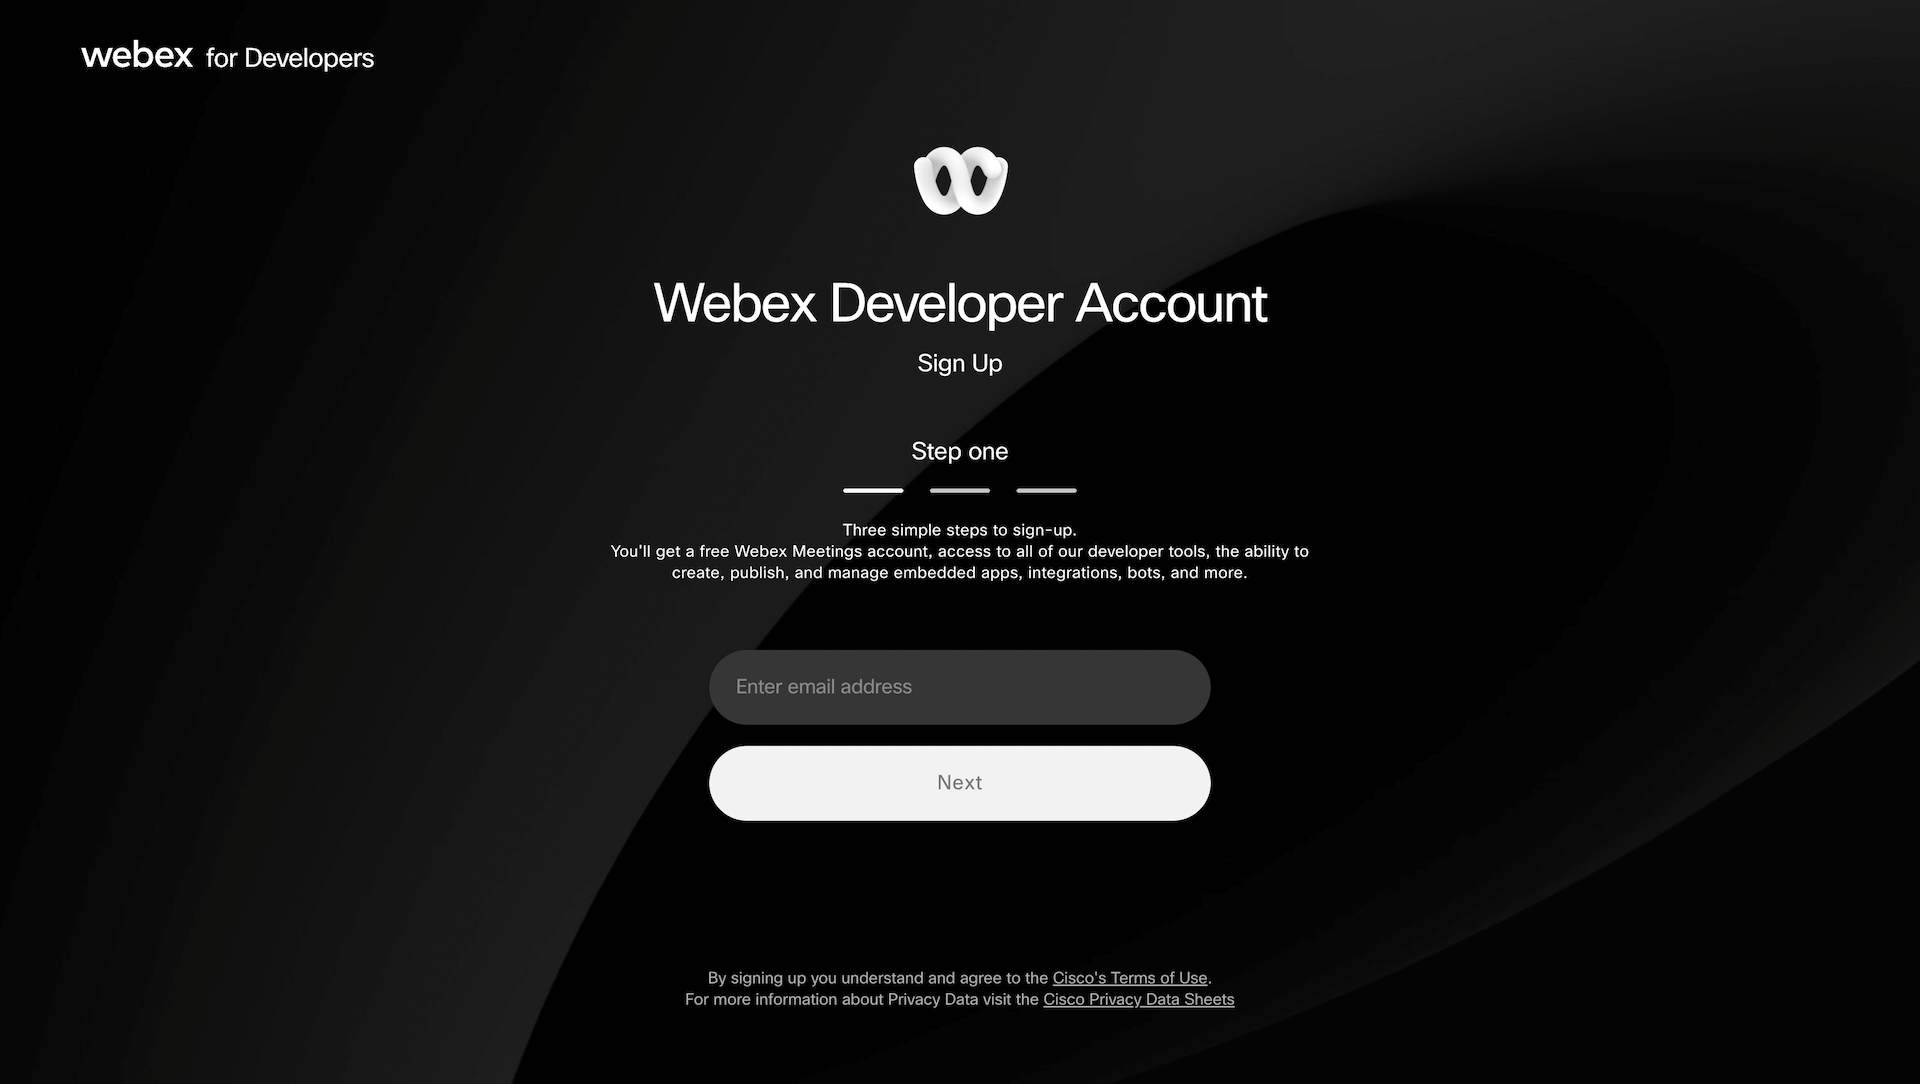
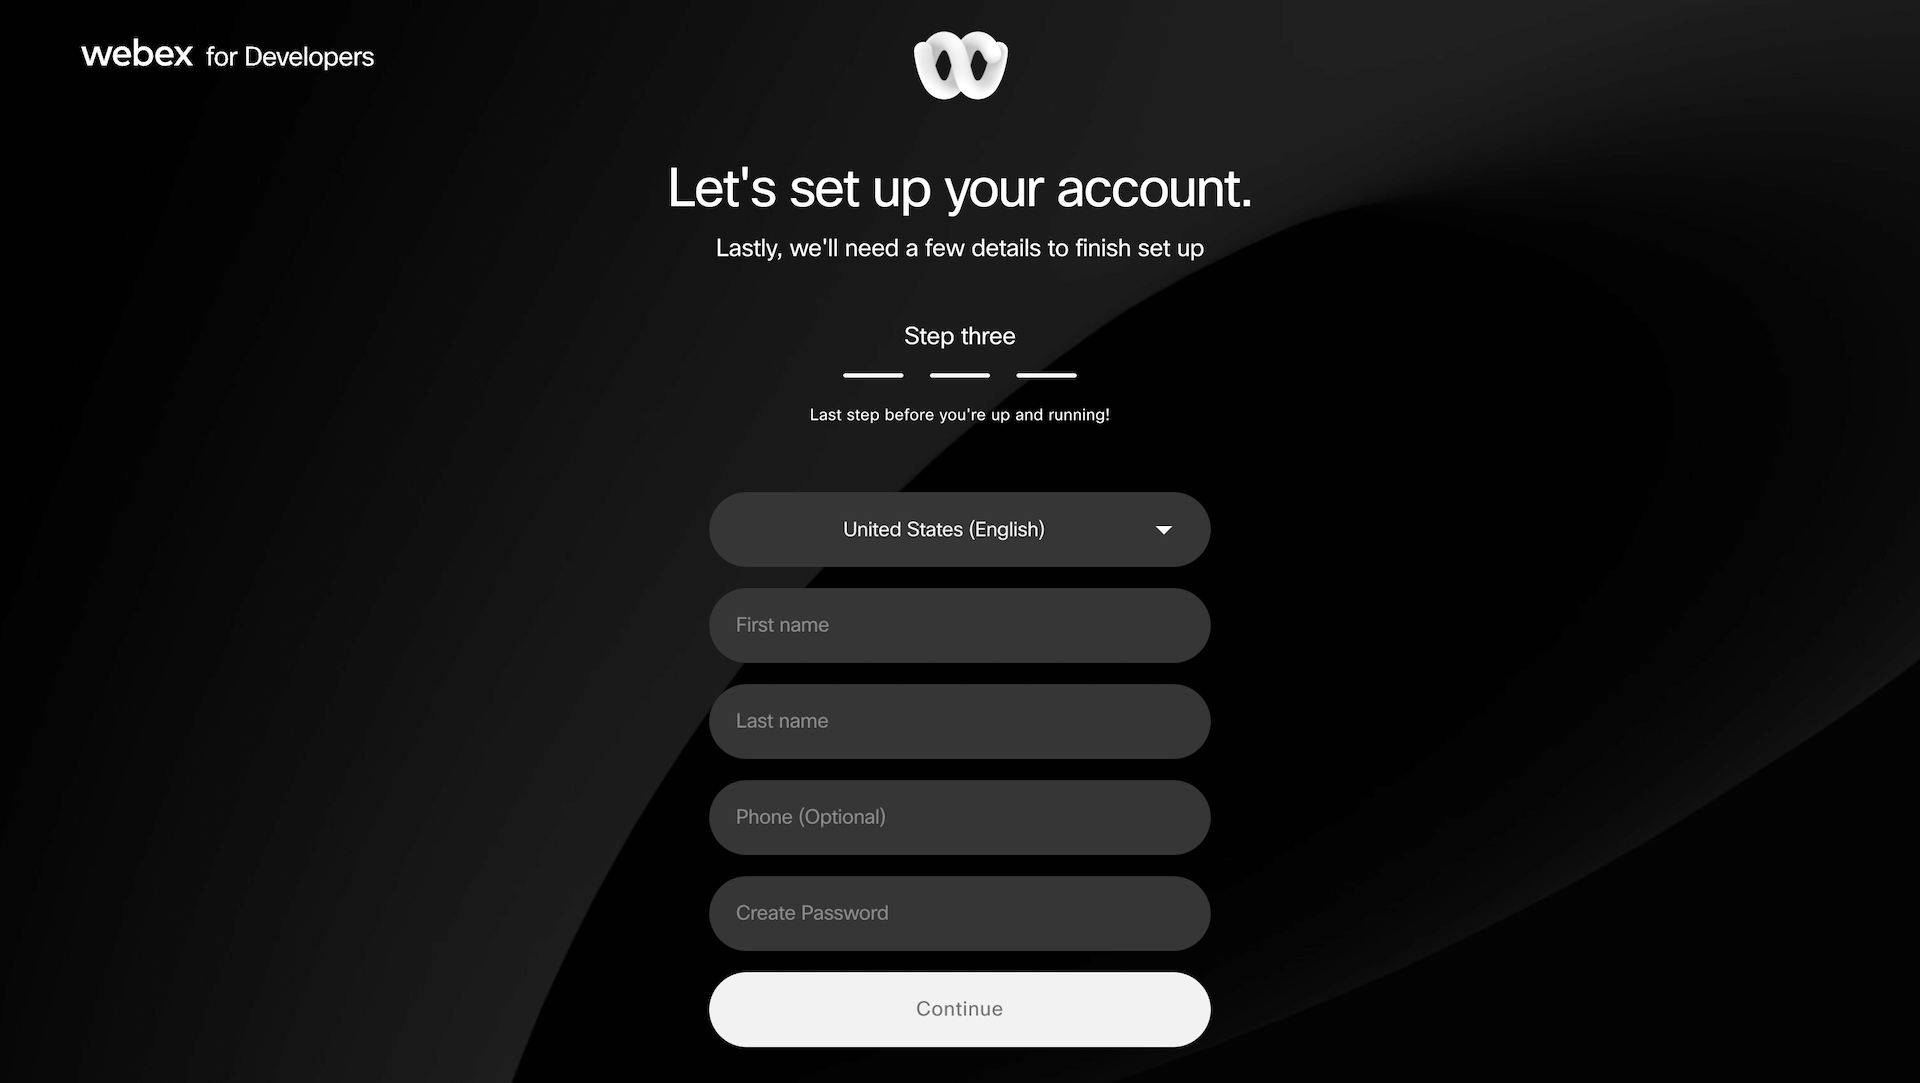
- Webex Account: You must have a valid Webex account. If you do not have one, you can create it via the Webex developer portal by verifying your email and providing the required registration details.
- Activation: Both MEC and the Webex Integration Addon must be installed and activated on your WordPress site. Once active, a new sub-menu for Webex Integration will appear under the MEC main menu.
Connecting the Apps (Authentication)
Connecting MEC to Webex requires creating an “Integration” app within the Webex ecosystem to facilitate a secure handshake.
Step 1: Register Your Webex Integration
- Log in to the Webex App Hub / Developer Portal and navigate to My Webex Apps.

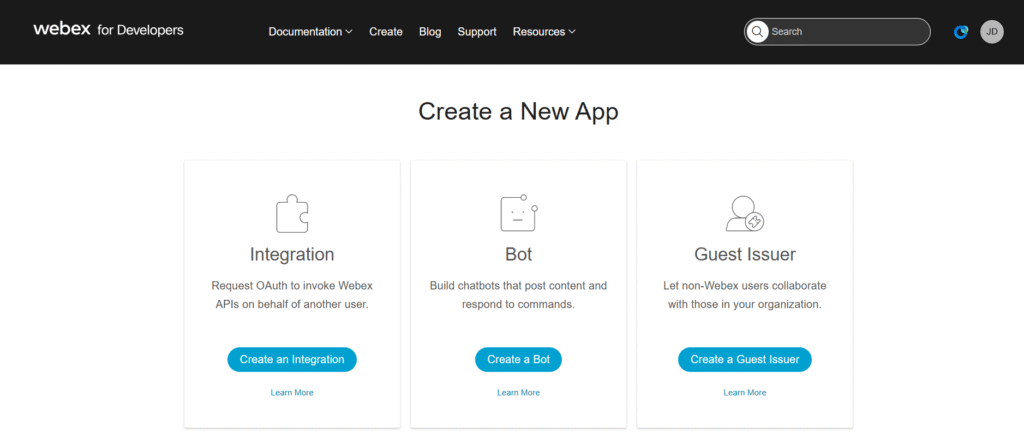
2\. Select Create a New App and then Create an Integration to start the configuration wizard.
3\. App Details: Provide user-facing information, including the integration’s name, description, and a logo.
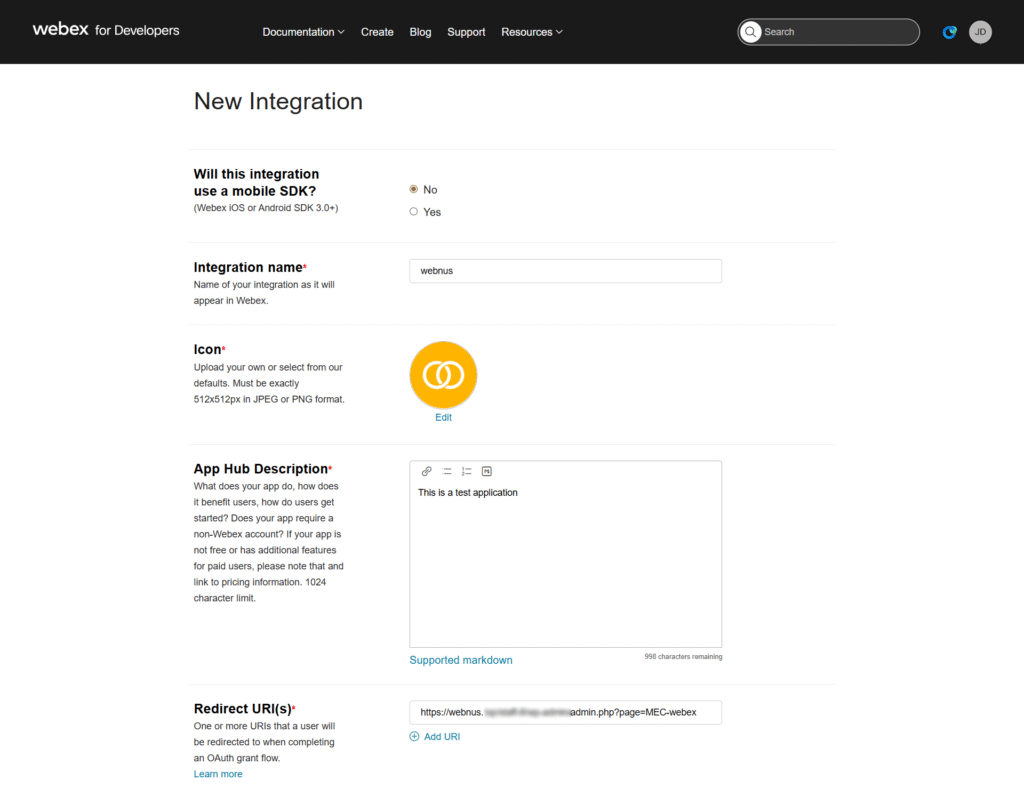
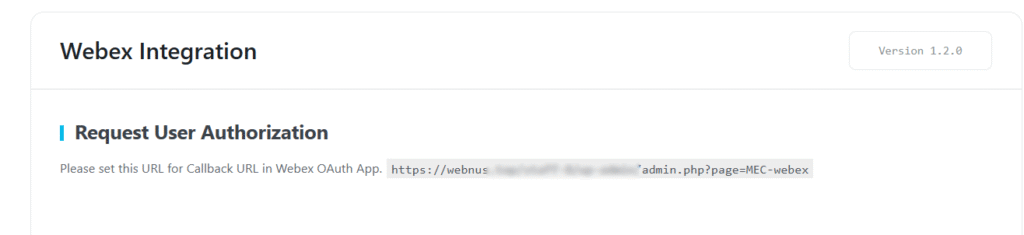
4\. Redirect URI: Locate the Redirect URI provided in your WordPress Dashboard > MEC Menu > Webex Integration and paste it into the Webex portal.
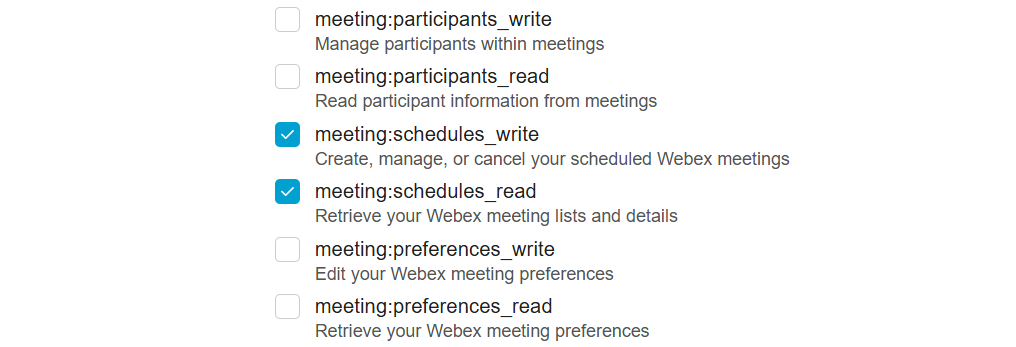
5\. Scopes: You must select the following specific scopes to allow MEC to manage your schedule: meetings:schedules_read and meetings:schedules_write.
Step 2: Configure App Settings
- Client Credentials: After registration, Webex will provide a Client ID, Client Secret, and Integration ID.
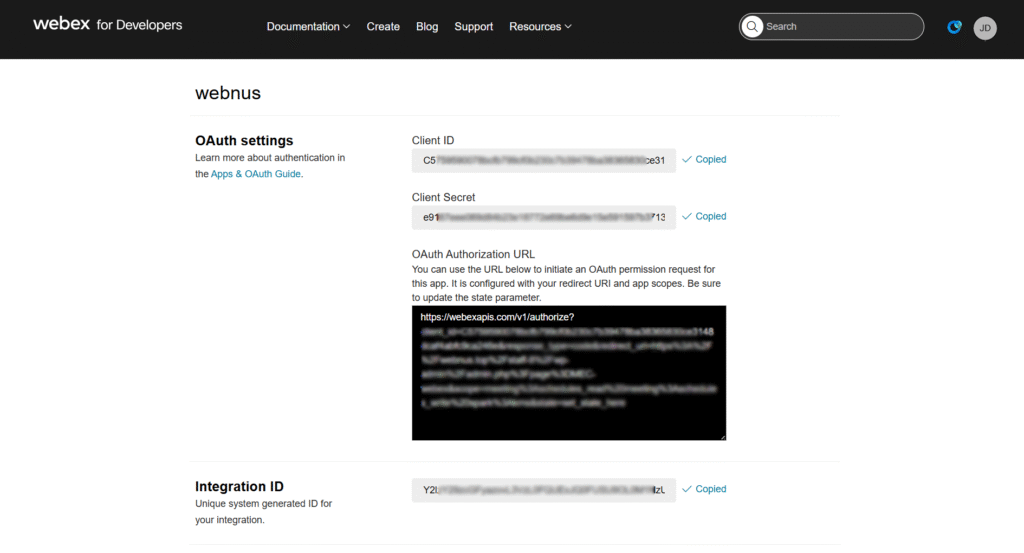
- Important: The Client Secret is only displayed once; you must copy and save it securely.
Step 3: Authenticate in WordPress
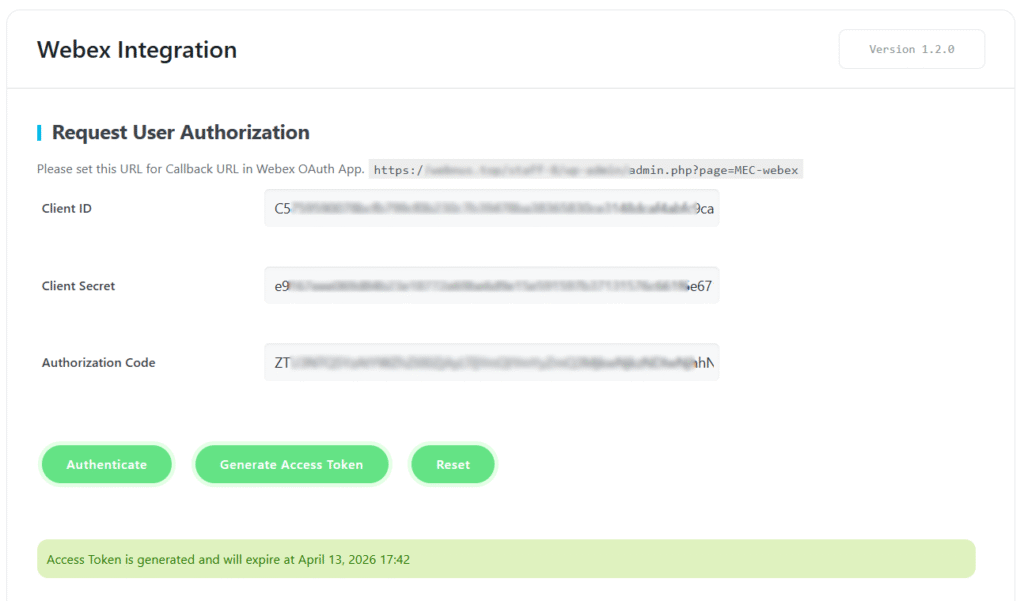
- Navigate to MEC Menu > Webex Integration and paste your Client ID, Client Secret, and Integration ID .
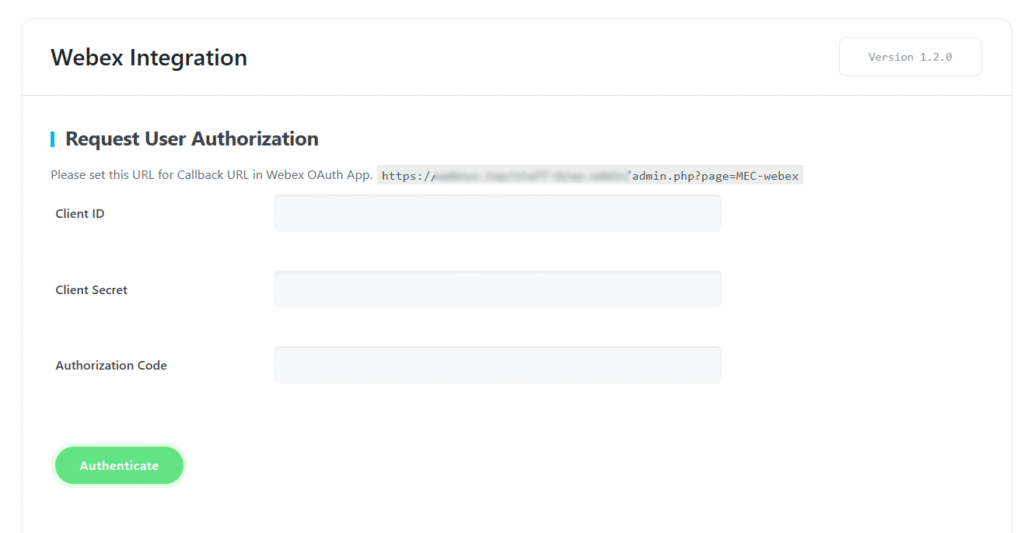
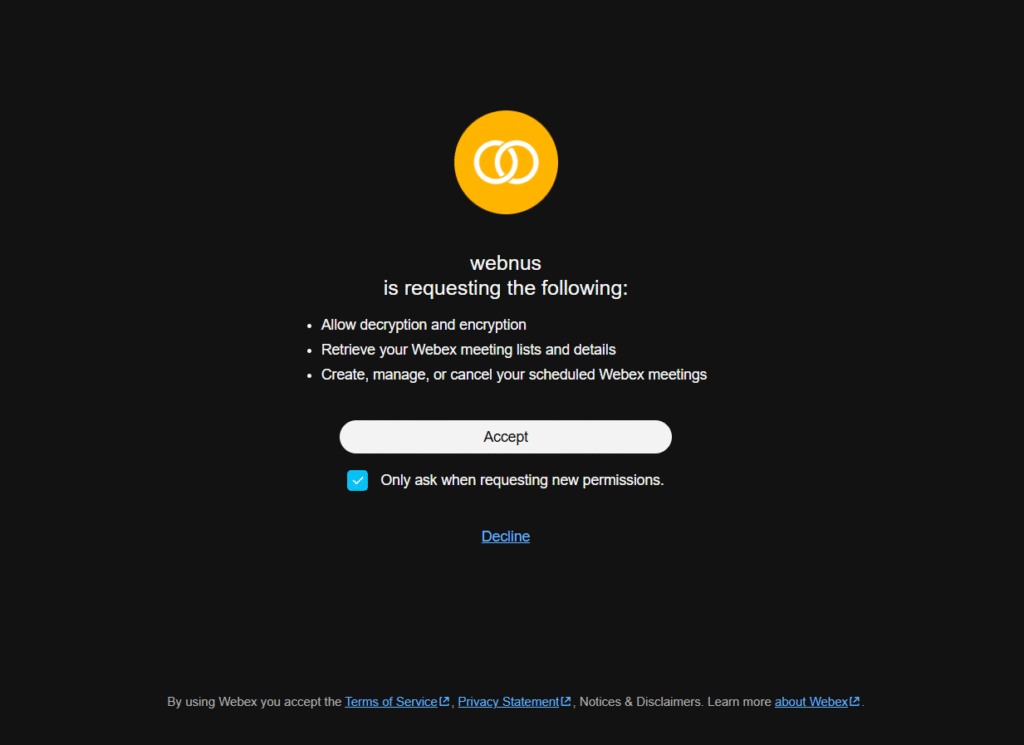
2\. Click Authenticate. A Webex permission window will appear; click Accept to confirm the account permissions.
3\. Finally, click Generate Access Token to obtain your credentials and finalize the connection.
Synchronizing Events (Import & Export)
The addon supports bi-directional synchronization, allowing you to manage your schedule from either platform.
Importing from Webex to MEC
- Navigate to the Webex Integration menu in MEC.
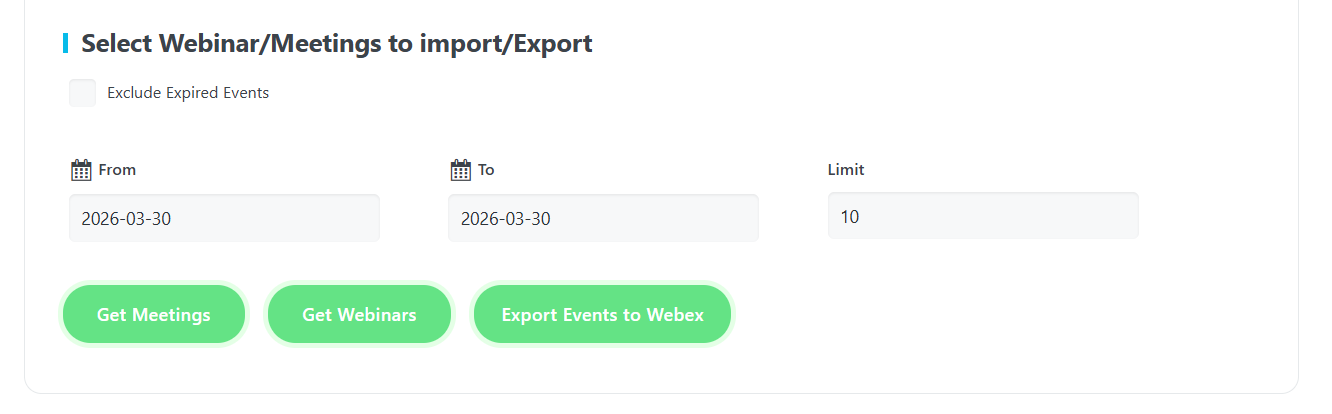
2\. Select the desired time period and set a limit for the number of events to fetch.
3\. Exclude Expired Events: Enable this option to prevent past meetings or webinars from being imported.
4\. Select the specific items you wish to sync and click Import. These events will now appear in your MEC events list and can be edited like any standard event.
Exporting from MEC to Webex
- Navigate to the Edit Event Page for the event you wish to sync.
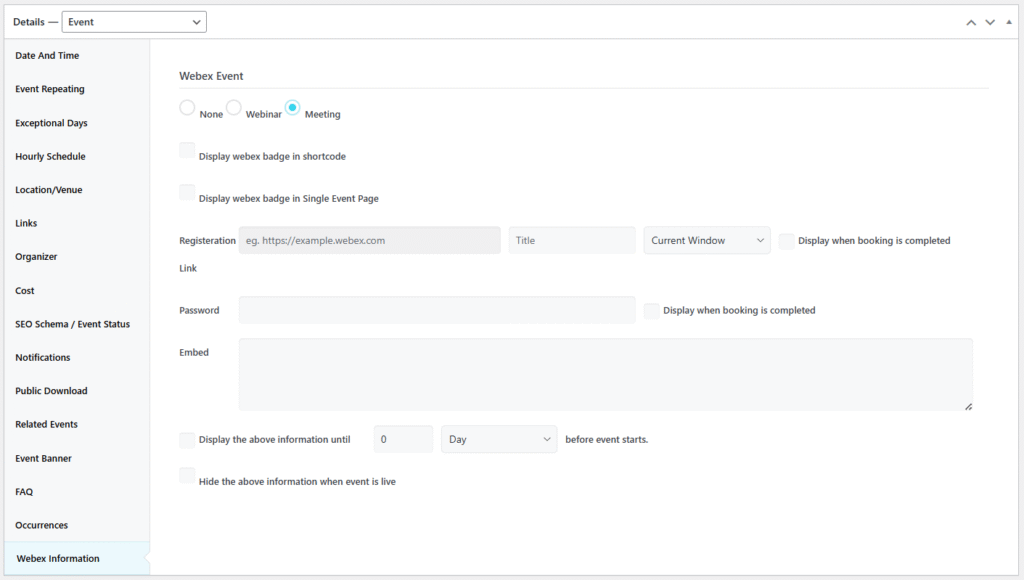
- Go to Event Details > Webex Information and define the event as either a Meeting or a Webinar.
- Navigate to the Webex Menu under MEC and click Export Events to Webex to select and transfer your events.
Configuration & Visibility Hub
You can customize the display of Webex details within the Webex Information tab of each individual event.
Visual Branding & Badges
- Shortcode Badges: Enable the Webex event icon to appear as a badge in all MEC shortcodes for easy identification.
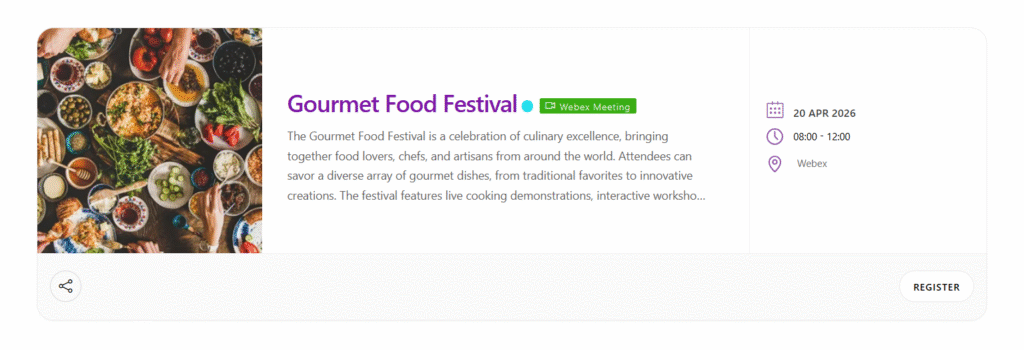
- Sidebar Badge: Display a dedicated Webex event badge in the sidebar of the Single Event page.
Access Security
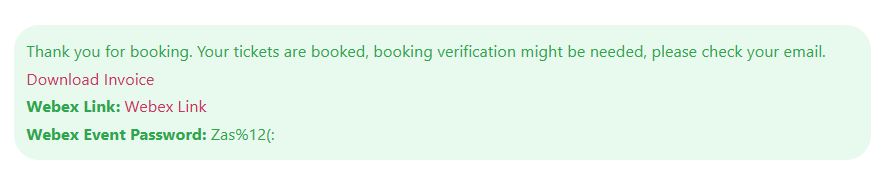
- Post-Booking Restrictions: By selecting the checkbox located next to the Registration Link and Password fields, you enable an immediate, temporary display of those details within the booking form itself right after a successful registration. This is designed for the immediate user experience and disappears once the form is closed.
Visibility Logic
- Timed Visibility: Use the View the above info at a certain interval before the event starts option to specify exactly when the join details become visible to attendees.
- Live Concealment: Enable Hide the details once the event is live to automatically conceal join links and passwords as soon as the session begins.
Notifications & Integration
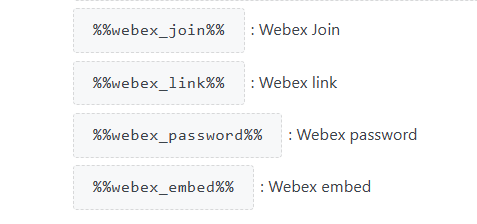
- Email Communication: The addon includes specific placeholders that you can add to your MEC email templates. This automatically sends the Join URL and Password to users immediately after they make a reservation.
- Enhanced Details: Beyond links, you can provide an Embed code and a Password to join the Webex event directly from your site.
Use Cases (When This Addon is Useful)
- Secure Virtual Workshops: Ideal for paid webinars where you only want the “Join Link” visible to users who have successfully registered and paid.
- Automated Event Onboarding: Useful for organizers who want to automate the delivery of Webex credentials via email, reducing manual administrative tasks.
- Hybrid Schedule Management: Perfect for managing a mix of physical and virtual events in one central MEC dashboard while keeping them synchronized with your Webex professional account.
Situations This Addon May Not Be Ideal
- Multi-Account Management: The addon only allows you to connect to one Webex account at a time. To switch accounts, you must disconnect the current one and enter new credentials.
Troubleshooting for Beginners
- Authentication Errors: If the “Authenticate” step fails, double-check that your Redirect URI in the Webex Developer portal matches the one provided in the MEC settings exactly.
- Missing Data in MEC: If meetings are not appearing for import, ensure you selected the correct scopes (schedules_read and schedules_write) during the Webex App registration.
- Expired Tokens: If you are unable to export events, you may need to navigate to the Webex Menu in MEC and click Generate Access Token again to refresh your connection.
FAQ
How do I install and activate the Webex Integration Addon for MEC?
First, ensure that both the Modern Events Calendar (MEC) and the Webex Integration Addon are installed and activated on your WordPress site. After activation, a new sub-menu for Webex Integration will appear under the MEC main menu, allowing you to access and configure the integration settings.
What does the Webex Integration Addon for MEC do?
The Webex Integration addon connects Modern Events Calendar to Webex, enabling you to display details about your Webex meetings and webinars to users, such as links and passwords.
How can I create a Webex account to use with the addon?
To create a Webex account, visit the Webex developer portal. Enter your email address to receive a verification code, then provide the required information to complete the registration process.
What are the steps to register and configure my Webex Integration for MEC?
After creating a Webex account, register your integration by logging into the Webex developer portal and selecting “Create a New App,” then “Create an Integration.” Provide the necessary information, including your integration’s name, description, and logo. After registration, you’ll receive a Client ID and Client Secret. Configure your app by setting the Redirect URI (available in the Webex Integration addon dashboard) and selecting the required scopes, specifically “schedules_read” and “schedules_write.”
How do I authenticate and generate an access token for the Webex Integration?
In the Webex Integration settings within MEC, click on “Authenticate” to create the Authorization Code. Then, click on “Generate Access Token” to complete the authentication process.
Can I integrate multiple Webex accounts?
No, the Webex Integration addon only allows you to connect one Webex account at a time. The addon uses Client ID and Client Secret, which can only be linked to a single Webex account. If you need to switch to a different Webex account, you would have to disconnect the current account and then connect the new one by entering the new Client ID و Client Secret in the MEC Webex Integration settings.
How can I import Webex meetings and webinars into MEC?
Navigate to the Webex Integration menu in MEC. Select the desired time period and set a limit for the number of events to import. Check the “Exclude Expired Events” option to avoid importing past events. Then, select the meetings or webinars you wish to import and click “Import.”
Is it possible to export events from MEC to Webex?
Yes, you can export events from MEC to Webex. Define the event type (meeting or webinar) in the event details under “Webex Information.” Then, go to the Webex Integration menu in MEC and click “Export Events to Webex” to select and export the desired events.
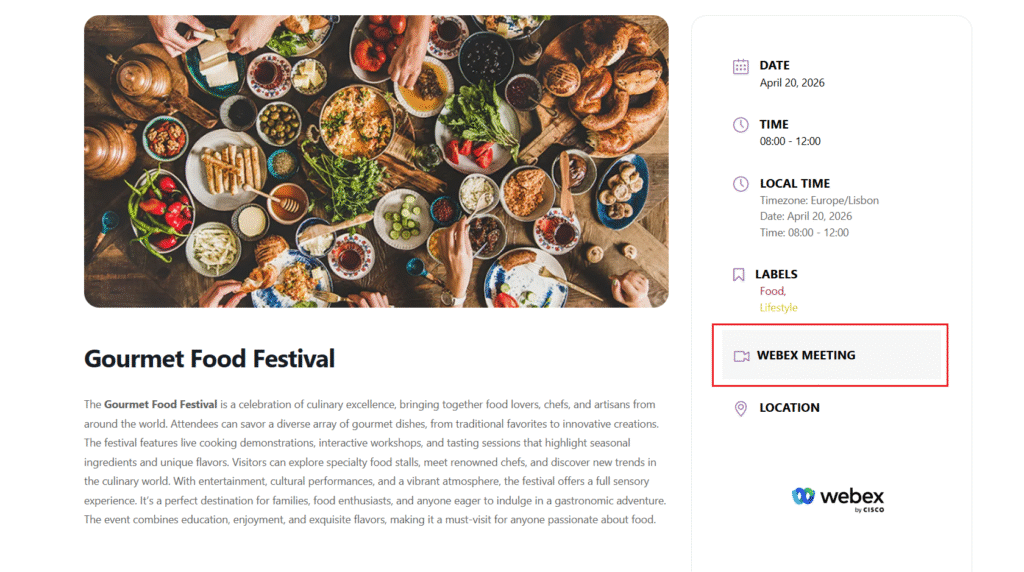
How do I display Webex meeting details on my event pages?
In the event’s “Webex Information” tab, you can provide the join URL, password, and embed code. You can choose to display this information to all users or only to those who have made a booking.
How can I select whether my Webex event should be a Meeting or a Webinar?
You can set the event type by going to the Edit Event Page for each event, navigating to “Event Details > Webex Information”, and selecting if it is a Meeting or a Webinar.
Can I send Webex event details to attendees via email?
Yes, the addon provides specific placeholders that you can use to embed Webex event information in the emails sent to users after they make a reservation.
How can I add a Webex badge to my events?
In the event’s “Webex Information” tab, you can enable the option to display a Webex badge. This badge can appear in the sidebar of the single event page and in all shortcodes, helping to distinguish Webex events from others.
Is it possible to restrict access to Webex meeting details only to users who have booked the event?
Yes, you can limit the visibility of the join URL and password so that only users who have made a booking can view this information. To do this, check the boxes in front of the ‘Link and Password’ options in the event’s “Webex Information” tab. This ensures that the details are only displayed after a reservation is made.
How do I manage imported Webex events within MEC?
Imported Webex events appear in your MEC events list. You can edit these events like any other MEC event, updating details such as the title, description, date, time, and additional settings as needed.
Can I control when users see the Webex event details before the event starts?
Yes, you can control this through the “View the above info at a certain interval before the event starts” option on the Edit Event page, within the Webex Information menu. This allows you to set a specific time interval before the event starts for the Webex details to become visible.
Is it possible to hide Webex event details after the event goes live?
Yes, you can enable this through the “Hide the details once the event is live” option on the Edit Event page, within the Webex Information menu. This ensures that Webex event details are automatically hidden as soon as the event starts.
Updated on: 04/04/2026
Thank you!